


News
Pet Stain Remover Not Working? Common Surface Mistakes and Better Fixes
If your pet stain remover seems useless, don’t assume the formula failed. In a lot of homes, the bigger problem is mismatch: the wrong cleaner for the surface, scrubbing at the wrong stage, or letting the mess sit too long. Pet urine, vomit, drool, and tracked-in dirt do not behave the same way on carpet, upholstery, sealed wood, laminate, grout, or vinyl. A pet stain remover can only do its job if the surface allows it to reach the stain without spreading it deeper.
This is the checklist I would use before blaming the bottle.
Check the surface before you spray anything
One of the most common mistakes is treating every stain as if it’s on carpet. That works until it doesn’t. A pet stain remover that performs well on synthetic rug fibers may leave water marks on fabric upholstery or create swelling on unsealed wood edges.
- If the surface is carpet, check whether the stain is only in the top pile or likely in the pad underneath. A repeated odor after cleaning usually means it traveled deeper.
- If it’s a sofa or chair, identify whether the fabric is absorbent, delicate, or prone to ring marks. Overwetting is a bigger problem here than on carpet.
- If it’s wood or laminate, the goal is usually fast removal and minimal moisture, not saturation.
- If it’s tile, the visible stain may be gone while the grout still holds odor.
That first check changes the whole cleaning approach.
Stop scrubbing fresh stains right away
Fresh accidents tempt people to attack the area with a brush. On carpet and upholstery, that often pushes liquid sideways and downward. The stain looks bigger because it is bigger.
For a new mess, blot first with plain absorbent towels. Press firmly. Replace the towel and press again. Keep going until transfer slows down. Only then apply the cleaner. If the label gives a dwell time, respect it. Many consumers spray and wipe immediately, which cuts the contact time the formula needs to break down residue.
If you can still feel dampness deep in the carpet with your fingers after blotting, there is probably more in the backing than what you see on top.
Carpet problems are usually deeper than they look
When people say a pet stain remover is “not working” on carpet, two patterns show up again and again: the area smells fine while wet but starts smelling again after drying, or the pet returns to the same spot. Both suggest residue below the surface.
A better fix is to treat the full affected area, not just the visible edge. If the accident soaked through, surface cleaning alone is cosmetic. On older or repeated pet spots, you may need multiple treatment cycles and full drying between them. Rushing repeated applications onto a damp carpet can trap moisture and make odor diagnosis harder.
Also watch your water use. Too little cleaner does not reach the contamination, but too much leaves the area waterlogged. The right amount depends on the thickness of the pile and whether the incident is fresh or dried.
Upholstery needs a lighter hand
Sofas, dining chairs, and pet beds get ruined by over-application more often than by the stain itself. A lot of fabrics wick moisture outward as they dry, which leaves a larger ring than the original spot.
- Test in a hidden area first.
- Apply to a cloth or use a very controlled spray, instead of soaking the fabric.
- Blot from the outside toward the center.
- Dry the area quickly with airflow.
If the cushion insert absorbed urine, the cover may not be the real problem. In that case, treating only the fabric surface rarely solves the odor completely.
Wood, laminate, and vinyl are not “spray generously” surfaces
Hard floors are where good intentions cause permanent damage. People often use a pet stain remover the same way they use it on carpet, and that is where seams lift, edges swell, or finishes turn dull.
On sealed wood or laminate, wipe up the accident first, then use a lightly dampened cloth with cleaner rather than flooding the floor. Pay attention to board joints and beveled edges. If liquid has already seeped into gaps, odor may remain below the visible surface, and heavy rewetting usually makes that worse, not better.
Vinyl is more forgiving, but textured surfaces can trap residue. That is a detail people miss. The floor looks clean until warm weather or humidity brings the smell back.
Tile can fool you because the tile cleans faster than the grout
Smooth tile is usually easy. Grout is not. If odor lingers in a tiled laundry room, mudroom, or near a litter area, the grout lines deserve most of your attention. They are porous, especially if sealing is old or incomplete.
Use enough product to contact the grout, allow proper dwell time, then blot or rinse according to label directions. Avoid mixing products. Combining cleaners because “one didn’t work fast enough” is a bad habit and can create surface damage or safety issues. If you do not know whether a previous product was bleach-based or acidic, proceed cautiously and ventilate well.
Old stains need a different mindset
A dried stain that has been there for days is not the same job as a fresh accident. Residue has already bonded more tightly, and odor compounds may have spread beyond the visible mark. This is where unrealistic expectations hurt people. One pass may improve it without fully removing it.
Better practice: rehydrate the area carefully, let the cleaner sit as directed, blot thoroughly, and allow complete drying before judging the result. A stain that looks faint while damp can disappear after drying, but the reverse can also happen. Don’t score the result too early.
A quick reality check on product choice
Consumers often keep one cleaner for every mess in the house. That is convenient, but not always effective. In home care manufacturing, product performance usually depends on matching formula type to use case and material sensitivity. The cleaner that handles a pet accident well may not be the best choice for fragrance needs, and the product you like in one space may be wrong in another.
For example, if the issue is stale odor in a car after transporting pets rather than a visible stain, a dedicated in-car product makes more sense than repeatedly spraying fabric cleaner. A product like Jazz, designed for automotive use with natural plant extracts, focuses on air freshness and a long-lasting scent rather than stain removal. Different problem, different tool.
When to stop treating it yourself
There are a few signs that more DIY cleaning is unlikely to help:
- The odor returns every time humidity rises.
- The stain has penetrated cushion foam, carpet pad, subfloor, or board seams.
- The surface is delicate, dyed, antique, or has special finish requirements.
- You have already used multiple products and no longer know what residues are present.
At that point, professional cleaning or partial material replacement may be the more realistic fix. It is not dramatic. It is simply cheaper than slowly damaging the surface while chasing the smell.
If you want a simple rule to remember, it’s this: match the pet stain remover to the material, remove as much contamination as possible before applying anything, and don’t judge the outcome until the area is fully dry. Most “bad product” complaints start with one of those three mistakes.
Related Products
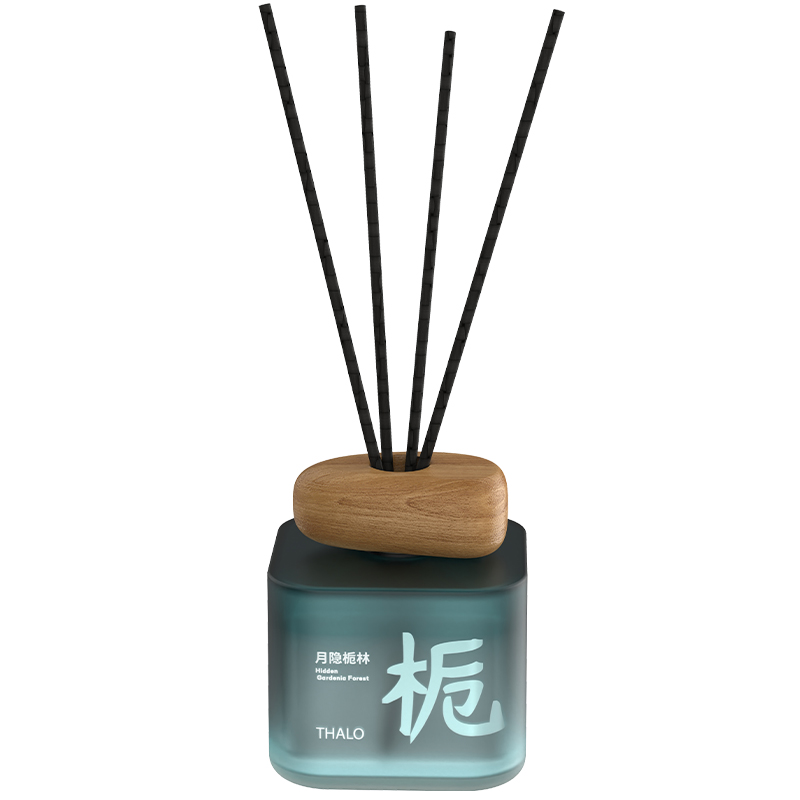
 ZHICHUNLet Nature Fill Your Space With Fragrance,Turn an ordinary room into a peaceful fragrance retreat. Thalo “Spring Awakening” Reed Diffuser brings the beauty of Oriental-inspired scents into everyday life, creating a warm and elegant atmosphere without flame, smoke or electricity.
Inspired by nature, the 180ml Home Fragrance Collection features three distinctive scents: Moonlit Gardenia Forest, Wumu Gradually Becomes Spring, and Green Tea Reflection Spring. Each fragrance unfolds gently through high-density reed sticks, filling your space with a continuous and refined aroma.
The frosted glass bottle, wood-inspired cap and minimalist design add a sophisticated decorative touch to any interior. Perfect for bedrooms, living rooms, bathrooms, offices, boutiques and hotels, this Natural Reed Diffuser creates a relaxing fragrance experience while helping refresh indoor air.
Bring a touch of spring, nature and tranquility into every moment with Thalo. XiaoxiangyuTitle: The Car Air Freshener That Keeps Every Mile Fresh
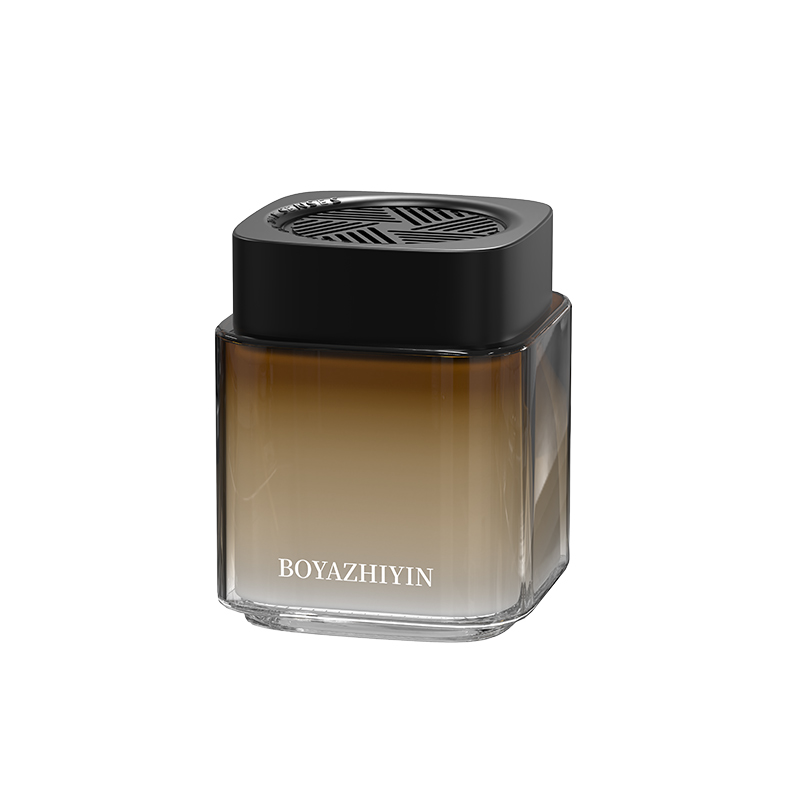
Every drive deserves a fresh, calming atmosphere. The BOYAZHIYIN car air freshener turns your car into a private sanctuary of natural scent. Crafted specifically for small spaces, this long lasting car air freshener delivers pure botanical fragrance without the dizzying intensity of ordinary car perfumes. Our solid gel formula releases scent steadily for weeks, keeping your cabin inviting from the first mile to the last. Each glass jar is built to impress, with a crystal-clear body and a striped diffusion lid that spreads fragrance evenly through every corner. Choose from four refined scents: Oud Rose, Wild Cologne, Dew Gardenia, or High Mountain White Tea. Made with plant essential oils, it is a natural car air freshener you can trust every single day. Breathe easier, drive happier, and enjoy a car that always smells as good as it looks. Ling FengTurn Every Drive Into a Fragrance Ritual
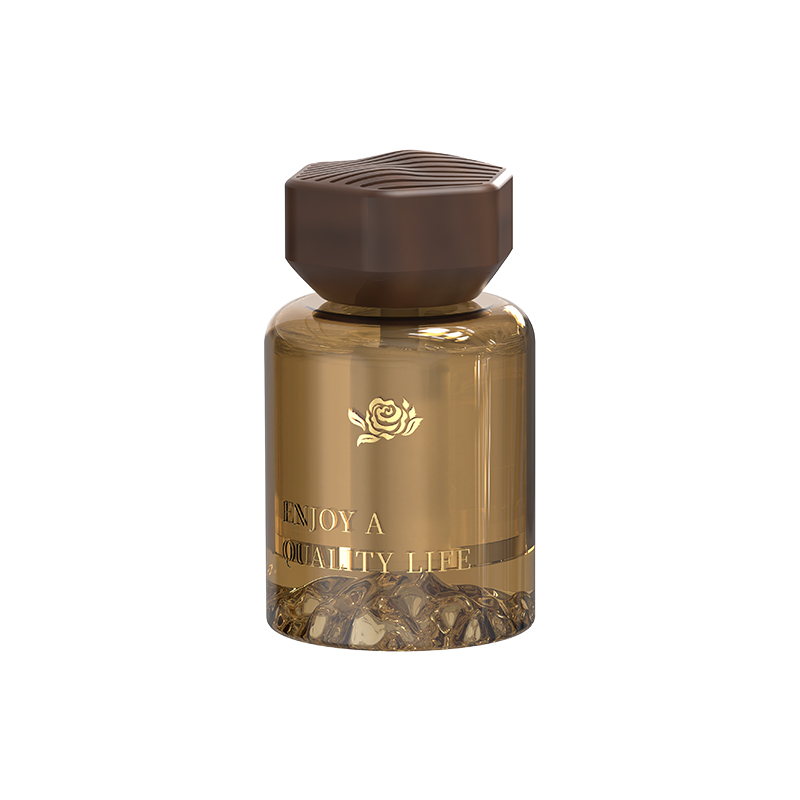
Step into your car and let a refined fragrance transform the atmosphere instantly. Designed for those who appreciate elegance in every detail, this premium car fragrance combines a sophisticated bottle design with high-quality fragrance oils to make every journey more enjoyable.
With 24-hour long-lasting diffusion and a 360° fragrance experience, the scent spreads evenly throughout your car without feeling overpowering. The oil-based formula helps maintain a smooth and consistent aroma, while perfume-grade fragrance creates a more layered and elegant scent experience.
From the fresh and delicate character of Misty Longjing to the deeper, sophisticated notes of Classic Cologne, every fragrance tells its own story. Black KnightA Fragrance That Turns Any Space Into a Memory
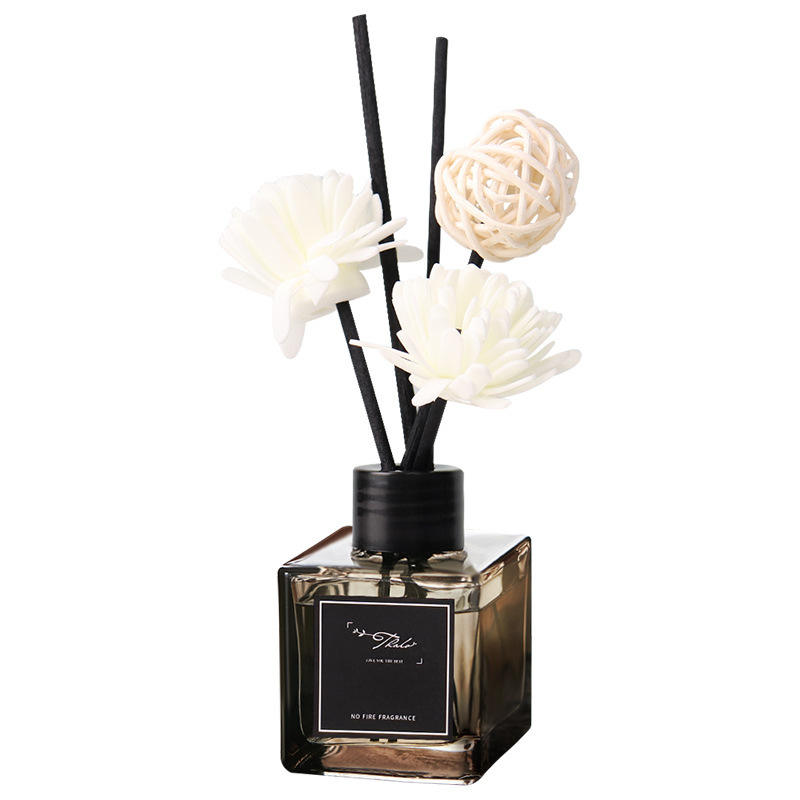
Bring nature indoors with Thalo Botanical Reed Diffuser, a premium home fragrance designed to transform everyday spaces into moments of calm. Crafted with botanical-inspired ingredients and imported fragrance oils, it releases an elegant, long-lasting aroma without flame or smoke.
The 50ml reed diffuser combines a deep brown bottle with high-density fiber reeds and handmade botanical dried flowers, creating both a beautiful decorative piece and an effective air freshener. From peaceful bedrooms to sophisticated living rooms, boutiques, hotels, exhibitions and special events, it adds a refined fragrance wherever you place it.
Choose a scent, place the diffuser, and let the fragrance unfold naturally.
Thalo — bringing the beauty of nature into every memorable moment.
Can't find what you're looking for ?
Leave a Message we will call you back quickly!
Professional Service
Interested? Leave your contact details.
Search Starts Here

